Monday, December 1, 2014

Easy Italian Chicken Bake

Sometimes simple is comforting, simple is soothing and simple is just what this momma needed after all of the holiday baking last week!  This super easy one dish meal is easy to throw together while the oven preheats and bakes in just an hour!  Even the pickiest eater in our family can't turn down this simple meal!


Easy Italian Chicken Bake

Ingredients:
4-6 raw chicken thighs or breasts
1-2 cans of your favorite green beans
1 lb Potaotes (raw) sliced, cubed or quartered
 ½ stick of butter 
1 packet of dry Italian dressing mix
Arrange the chicken, green beans, and potatoes in a 9x13 baking dish, top with the butter and dressing mix, cover with foil, and bake at 350 for about an hour. 
Ta-da... A great tasting meal is served!

Saturday, November 29, 2014

Crockpot BBQ Venison

Like many ladies in the south (and other parts of the US) I grew up with deer meat being a common main in our house- typically either stewed or BBQ since daddy always canned his deer.  We spent many a day helping to cut meat into one-inch cubes, a skill that amazed at least one of my college friends and
won the heart of my husband (not really- the opportunity to hunt in one of the best counties in NC helped).  My husband is an avid hunter- a true sportsman that helps to manage the population and educates himself and others about not only firearm safety but about hunting ethically and preserving wildlife for future generations. 

B got his first deer of the season last week- a big body doe that he cut up and put in the freezer.  (Which is perfect for me because I prefer the taste of doe meat which isn't as gamey tasting as buck meat).  We came across this recipe a couple of years ago and absolutely love the ease and tastiness of this meat!

Crockpot BBQ Venison

Ingredients
2-3 lbs of Venison, cubed
1 large onion, chopped
4 bacon strips, cut
Apple Juice
1 bottle of your favorite BBQ Sauce 

Directions
Place the cubed deer meat in the bottom of your crock pot.  Layer with chopped onions then bacon.  Pour enough apple juice to cover the meat (can use water or beef broth if you don't have apple juice- but it gives a nice sweetness and helps to tenderize the meat).  Cover and cook on low for 5-6 hours.  Remove meat and onion and pour out 1/2 of remaining juice.  Place meat and onions back in the crock and add the bottle of sauce and heat for approximately 30 minutes.  Serve shredded on buns (use two forks to shred meat) or serve by itself as a tasty main dish.  Leftovers can be frozen. (If there's any left!)

Wednesday, November 26, 2014

Vanilla Pecan Pie

Holiday baking is in full swing- we have been hard at it the last 7 hours (and working on our 3rd load of dirty dishes in the wash now) in preparation of tomorrow's festivities of Happy Christmas/Merry Thanksgiving with Daddy's family and Thanksgiving with Brian's family- I'm so excited to see everyone!  

I am beyond looking forward to this tomorrow- cheesecake meets pecan pie--- how can it be anything but divine?


Vanilla Pecan Pie


Ingredients:
  • 1 refrigerated pie crust, (from 14.1-ounce package)
  • 1 package (8 ounces) cream cheese, softened
  • 3 eggs, divided
  • 3/4 cup sugar, divided
  • 4 teaspoons McCormick® Pure Vanilla Extract, divided
  • 1/2 cup light corn syrup
  • 3 tablespoons butter, melted
  • 1/4 teaspoon salt
  • 2 cups pecan, pieces, toasted

Instructions:

Preheat oven to 350°F. Prepare crust as directed on package for one-crust pie using 9-inch deep dish pie plate. Beat cream cheese, 1 of the eggs, 1/4 cup of the sugar and 2 teaspoons of the vanilla in large bowl with electric mixer on medium speed until well blended and smooth. Spread evenly on bottom of crust. Bake 15 minutes.

Beat remaining 2 eggs and 1/2 cup sugar in large bowl with wire whisk until smooth. Add corn syrup, butter, remaining 2 teaspoons vanilla and salt; stir until well blended. Sprinkle pecans evenly over baked cream cheese layer. Slowly pour corn syrup mixture over nuts.

Bake 35 to 40 minutes or until just set in center. Cool completely on wire rack.


Source:http://www.mccormick.com/Recipes/Dessert/Vanilla-Pecan-Pie

Monday, November 24, 2014

Tomato Pie

One of my favorite dishes when we were growing up was my grandmother's tomatoes casserole- bread, fresh tomatoes, spices and cheese blended together to make our mouths water!  Several years ago I came across a recipe for Tomato Pie that was a new spin on that old favorite- cheesy tomatoey goodness served on the slightly sweet pie crust and I knew I had to try it!  Such a wise decision as this dish can make grown men weep and beg for more (okay so maybe that is a little bit of an exaggeration but we do have a friend who works out of town that makes me promise to fix him this dish if he is home). 

Tomato Pie
Note:  Use good mayo for the best flavor- I personally prefer Kraft (less greasy when it baked) but have also used Dukes to make this as well-  I would recommend blotting the top of the pie with a paper towel after it baked to absorb some of the oil.)

Ingredients

4 tomatoes, peeled and sliced (Roma)
10 fresh basil leaves, chopped (or you can sprinkle layers with Dried Basil and Oregano if you prefer)
1/2 cup chopped green onion
1 (9-inch) prebaked deep dish pie shell
1 cup grated mozzarella
1 cup grated cheddar
1 cup mayonnaise
Salt and pepper
Directions

Preheat oven to 350 degrees F.

Place the tomatoes in a colander in the sink in 1 layer. Sprinkle with salt and allow to drain for 10 minutes.

Layer the tomato slices, basil, and onion in pie shell. Season with salt and pepper. Combine the grated cheeses and mayo  together. Spread mixture on top of the tomatoes and bake for 30 minutes or until lightly browned.

To serve, cut into slices and serve warm.

[Orginal recipe from Paula Deen]

Sunday, November 23, 2014

Praline Toppepd Butternut Sqaush Casserole

It's hard to believe that Thanksgiving is just a few days away and the kick off to holiday baking and celebrating is here!  My mouth is watering at the thoughts of all the goodies that we gather around the table to enjoy, although my doctor would probably have a heart attack at the amount of calories that will be consumed over the next month! (But hey- it's all about moderation and in our house if we eat heavy at a family dinner we usually go light on supper and try to be "good" the rest of the week ;))  I will try my best to share some of our go-to holiday favorites and be better about posting more than once every 6 weeks!

Praline Topped Butternut Squash Casserole
Since I live in the land of Sweet Potato goodness, as North Carolina has ranked first in the nation in Sweet Potato production for over 40 years (since 1971), we enjoy the sweet golden tuber throughout the year and not just on special holidays, which is why I love to whip up this easy casserole dish as an alternative to a traditional sweet potato casserole.  Because of the butter and sugar, a spoonful goes a long way and it is a perfect for pot lucks and feasts since it's so rich!  (Plus it is gluten-free which is perfect for those members of our family that suffer with Celiac!)  I hope that you and yours enjoy them as much as we do!

My first try at this dish- circa 2009
2         Butternut squash, peeled and cubed (or 2 prepared bags)
7 Tbs. Butter, divided
1/2 t.   Salt
1/8 t.   Pepper
2         Eggs, beaten
1/2 c.  Brown Sugar, packed
1/2 c.  Walnuts, chopped
1/2 t.   Cinnamon (ground)
1/8 t.   Nutmeg (ground)

Boil squash in water to cover until soft; drain.  (Or prepare squash as directed on the bag in the microwave)
Process squash in a blender until smooth.  Transfer to a saucepan; stir in 4 Tablespoons of butter, salt and pepper.  Heat thoroughly; remove from heat. Stir in eggs; spread into a greased one-quart baking dish.  Set aside.  Combine brown sugar, walnuts, cinnamon, nutmeg and remaining 3 tablespoons of butter; sprinkling over squash mixture.  Bake at 350 degrees for 30 minutes.   (Serves 8)


Wednesday, October 8, 2014

Honey Lime Chicken with Simple Sesame Noodles

As an Ag teacher I get to wear many hats- from teacher, coach/advisor, event coordinator and sometimes even chef!  I must confess that sometimes my goals far outweigh what I actually accomplish!  I was reminded of one of those hats this week when one of my students mentioned that she was looking for a recipe for the Simple Sesame Noodles I made for them over the summer-  this chicken is awesome (but make sure you give it enough time to marinade and is best grilled- the smoke flavor adds just the right touch to send it over the edge). Hope you enjoy this simple and delicious Asian inspired meal!  (Round plot out with oven roasted broccoli for an amazing meal!)

Honey Lime Chicken Skewers

prep

15 minutes

wait

overnight

cook

20  minutes

serves

4


ingredients

Tbsp

Soy Sauce

Tbsp

Honey

Tbsp

Vegetable Oil

1  

Lime (Juice)

2

Garlic cloves, minced

1-2 t

Siracha


Red Pepper Flakes (to taste)

Tbsp

Cilantro

lb

Chicken Thighs

Opt.

Avocados


directions

In a small bowl, combine your ingredients through the cilantro.  Mix thoroughly.  Pour marinade over chicken and turn to coat.  Cover and marinate for at least an hour or more for stronger flavor.  Grill on medium high heat for 6-8 minutes per side, until juices run clear.


Simple Sesame Noodles    recipe from:  The Pioneer Woman

prep

10 minutes

wait

None

cook

10 minutes

serves

8


ingredients


12 oz.

Thin Noodles, cooked & drained

¼ c.

Soy Sauce

Tbsp

Sugar

4

Garlic cloves, minced

Tbsp

Rice Vinegar

Tbsp

Sesame Oil

½ tsp

Hot Chili Oil

Tbsp

Canola Oil

4

Green Onions, Sliced Thin


directions

Cook noodles according to package directions.  Meanwhile, whisk all ingredients (except noodles and green onions) together in a bowl. Taste and adjust ingredients as needed.  Pour sauce over warm noodles and toss to coat.  Sprinkle with green onions and toss.


Monday, September 22, 2014

Maryland Crab Cakes with a Mixed Green Salad with Citrus Vinaigrette


Although today marks the first day of fall, I wanted to share one of my favorite summertime meals that our family enjoys!  This weekend I was sharing with my sister about this great salad with this amazing dressing that we had found online at Allrecipes.com and have enjoyed several times over the summer- this is a perfect light meal with crusty bread that is easy to pull together and is delicious! 


Maryland Crab Cakes

Ingredients:
2 tablespoons olive oil
6 green onions, chopped
3/8 cup olive oil
1 (16 ounce) can canned crabmeat,
drained
1 egg
1 tablespoon mayonnaise
1 teaspoon dry mustard
8 ounces buttery round crackers,
crushed
1/2 teaspoon ground cayenne pepper
1 teaspoon garlic powder
1/4 teaspoon Old Bay Seasoning TM
salt to taste
ground black pepper to taste
1 cup panko (Japanese bread crumbs) or
regular dry bread crumbs
Directions:
1. Heat 2 tablespoons oil in a skillet over high heat. Saute green onions briefly until tender; cool slightly.
2. Combine crabmeat, sauteed green onions, egg, mayonnaise, dry mustard, crushed crackers, cayenne pepper, garlic powder, Old Bay seasoning, salt and pepper. Form into 1/2 inch thick patties. Coat the patties with bread crumbs.
3. Heat 1/2 cup oil in a skillet over medium high heat. Cook cakes until golden brown on each side. Drain briefly on paper towels and serve hot.


Old Bay Garlic Aioli


ingredients
2-3 Garlic cloves, minced
1 tsp Kosher Salt
½ c Mayonnaise
2 tsp Lemon Juice, fresh
1 Tbsp Olive Oil
2 tsp Old Bay Seasoning
¼ tsp Black Pepper
. *Adjust seasonings to taste

directions
On a cutting board finely mince garlic using a broad blade knife. Sprinkle with Kosher Salt and use the flat edge of the knife to create a garlic paste. Mix garlic mixture and mayonnaise with a whisk until well blended. Slowly add Olive Oil and Lemon Juice to mixture, whisking to make a smooth creamy consistency. Add Old Bay and Pepper and whisk again. (Adjust seasonings to personal taste) Serve over crab cakes. Store in air tight container for up to a week.

Orange, Walnut, Gorgonzola and Mixed Greens Salad with Fresh Citrus Vinaigrette
Ingredients:
3/4 cup walnut halves
10 ounces mixed salad greens with
arugula
2 large navel oranges, peeled and
sectioned
1/2 cup sliced red onion
1/4 cup olive oil
1/4 cup vegetable oil
2/3 cup orange juice
1/4 cup white sugar
2 tablespoons balsamic vinegar
2 teaspoons Dijon mustard
1/4 teaspoon dried oregano
1/4 teaspoon ground black pepper
1/4 cup crumbled Gorgonzola cheese
Directions:
1. Place the walnuts in a skillet over medium heat. Cook 5 minutes, stirring constantly, until lightly browned.
2. In a large bowl, toss the toasted walnuts, salad greens, oranges, and red onion.
3. In a large jar with a lid, mix the olive oil, vegetable oil, orange juice, sugar, vinegar, mustard, oregano, and pepper. Seal jar, and shake to mix.
4. Divide the salad greens mixture into individual servings. To serve, sprinkle with Gorgonzola cheese, and drizzle with the dressing mixture.                                                                                              This dressing is WONDERFUL as a marinade as well! 

Monday, September 15, 2014

Hot Pumpkin Hot White Chocolate

Shhh.... don't tell Starbucks but their pumpkin craze has NOTHING on this fall beverage!  Rich and creamy- it is perfect to serve on a cool fall evening around a fire, or with friends or just because!  A friend shared this recipe with me several years ago and it has become a tradition to make at least once before the hustle and bustle of the holidays!  Cheers!


Hot Pumpkin Hot White Chocolate

Ingredients:


  • 4 cups of milk 
  • 1 (15 oz.) can of pumpkin
  • 1 (14oz.) can of sweetened condensed milk 
  • 1 tsp. pumpkin pie spice 
  • 8 oz. of finely chopped white chocolate
  • 1 tsp. vanilla 
  • Garnish: whipped cream, pumpkin pie spice, cinnamon stick

Directions:

In a large pot, combine milk, pumpkin,condensed milk, pumpkin pie spice, chopped white chocolate and vanilla. Stirring frequently until chocolate is melted and mixed well. Ladle into mugs and Garnish.

Pumpkin Crunch Cake

The cool weather the last few days have really gotten me in the mood for all things fall- especially mouth watering desserts and drinks that feature the tastes of the season!  Today one of my friends asked that I share one of my favorite pumpkin recipes and I immediately thought of this cake!

As an Agriculture Teacher and FFA Advisor, fall also means that National Convention is just around the corner!  It is an amazing site to see 56,000 of our nation's best and brightest gather in their blue corduroy jackets- and the pride and enthusiasm they have for the agriculture industry!  Several years ago, while walking through the FFA Career Show, I picked up a handout from an Indiana Egg Cooperative that had the following recipe featured in it, and had to try it when I got home!  It was love at first bite!  I was so proud and excited that I made one to take to my Grandma (who is a wonderful cook and fabulous baker) who laughed and pulled out the same recipe from her recipe box that she had discovered the week before!  I hope that you and your family enjoy this easy dessert as much as we have!

 Pumpkin Crunch Cake

  1. 1 can Pumpkin Puree (15 ounce)
  2. 1 can Evaporated Milk (12 ounce)
  3. 4 Eggs
  4. 1 1/2 cups Sugar (white)
  5. 2 teaspoons Pumpkin Pie Spice
  6. 1 teaspoon Salt
  7. 1 pkg. Yellow Cake Mix (18.25 oz)
  8. 1 cup Chopped Pecans
  9. 1 cup Butter, melted
  10. 8 oz  Cool Whip
Instructions
  1. Preheat oven to 350 degrees and lightly grease a 9x13 baking pan.
  2. In a large bowl, combine pumpkin, evaporated milk, eggs, sugar, pumpkin pie spice and salt.  Mix well and spread into the prepared pan.
  3. Sprinkle dry cake mix over the top of the pumpkin mixture, and pat down.  Sprinkle with the chopped pecans evenly over the cake mix and drizzle with the melted butter.
  4. Bake 60-80 minutes, or until done.  Top with whipped topping when ready to serve. 
Makes 1 9x13 cake

Sunday, September 14, 2014

Carmel Apple Nut Pound Cake

There are so many great reasons to celebrate fall- with the harvest season upon us it's no wonder why so many family gatherings occur this time of year!  We recently celebrated my husbands great aunt's birthday with a potluck dinner and this was just the excuse I needed to pull out this great recipe! (Am I the only one who wants to impress their sweetie and his family of their culinary talents?)

This cake, from the Paula Deen magazine, is perfect for fall!  No one will ever guess the secret ingredient in this scrumptious cake :).  I will say there was more than enough icing to make two cakes- so you may want to cut the icing ingredients in half to keep a diabetic coma from occurring at the first bite ;) (This recipe is not friendly for those who suffer from sugar issues- and a little bit goes a long way so it's best to not make giant sized pieces :)). Hope you enjoy it as much as we do!
  1. 1 cup peeled, cored, and diced Granny Smith apple (about 1 large)
  2. 1 cup chopped walnuts
  3. 3 1⁄4 cups all-purpose flour, divided
  4. 2 cups butter, softened
  5. 2 cups sugar
  6. 6 large eggs, at room temperature
  7. 2 teaspoons vanilla extract, divided
  8. 1 (3.4-ounce) package instant butterscotch-flavored pudding mix
  9. 1 (10.75-ounce) can Campbell’s® Cheddar cheese soup
  10. 1 teaspoon baking powder
  11. 1⁄2 cup butter
  12. 2 cups firmly packed dark brown sugar
  13. 2 tablespoons heavy whipping cream
Instructions
  1. Preheat oven to 325°. Spray a 15-cup fluted pan with nonstick baking spray with flour.
  2. In a medium bowl, combine apples, walnuts, and 1⁄4 cup flour.
  3. In a large bowl, beat 2 cups butter and sugar at medium speed with an electric mixer until creamy. Reduce speed to low. Add eggs, one at a time, beating well after each addition. Increase speed to high, and add 1 teaspoon vanilla; beat for 2 to 3 minutes, or until mixture is fluffy. Reduce speed to low, and add pudding mix and soup; beat for 1 minute. Increase speed to medium, and beat for 1 minute longer.
  4. In a medium bowl, sift remaining 3 cups flour and baking powder together. Gradually add to butter mixture, and beat until mixture is well combined, about 2 to 3 minutes. Fold in apple mixture.
  5. Pour batter into prepared pan. Drop pan lightly on counter to release any air bubbles. Bake for 1 hour and 30 minutes, or until a wooden pick inserted in center comes out clean. Let cool in pan for 10 minutes. Remove from pan, and cool completely on a wire rack. Place wire rack over a large piece of aluminum foil.
  6. In a small saucepan, melt 1⁄2 cup butter over medium heat. Stir in dark brown sugar and remaining 1 teaspoon vanilla. Add cream, stirring constantly until combined. Pour mixture over cooled cake.
Makes 1 10-inch fluted cake

Fall is in the air!

Where has the last few weeks gone?  It seems like the first few weeks of school is always the hardest- striving to do the best in the classroom, trying to set a new routine, tweaking things for the new year and of course the exhaustion of getting back into the swing of things!  

We have been celebrating at our house as well!  The youngest just turned two and the oldest is getting ready to be four Friday!  We celebrated with family and friends with a joint birthday party last night- we did a Cars theme and had a great time!  (Although I am going to stay off Pinterest for their party next year, simple may be better ;)). 

This time of year marks another celebration and milestone in our family- the two year anniversary of the scariest moments of our married life as we almost lost our 9 day old baby- in someways I celebrate his survival more than his birth and am humbled by God's healing grace!  
(More on his story to come- I want to dedicate a post to how we see God each and every day!)

Okay- enough of the rambling but it is good to post again--- I promised a dear friend I would share a cake recipe, so be on the lookout for this knockout of a fall dessert!

Blessings!

Sunday, August 17, 2014

End of Summer...

It is hard to believe that the end of summer is almost here!  Where has time gone, didn't the students just walk across the floor at graduation and now its time to think about them getting back into the swing of things.  It seems like no matter how hard as teachers we try to plan ahead and organize to make our little domain's run smoothly it is always an adjustment in getting to know your new kids, preparing for your classes, making sure your room looks "just right" for that first day of school (clean-organized and if your me, hopefully a LITTLE bit of cuteness) and getting back into the routine of living by bells- bells that tell you when to start and stop teaching, when to go to lunch, when to run to make copies, and when to go to the bathroom... its amazing how we program ourselves to respond to the sound of those bells!

My fellow teachers come back to work this week.  It is amazing how your coworkers become extensions of your family and you look forward to seeing them and celebrating life with them!  I know our staff is excited and nervous as we have had a LOT of administrative changes this year and aren't quite for sure what to expect yet.  There is a total different feeling in our school than at the end of the year last year, an excitement for what will be and a slight fear because of the changes that have taken place in a short time.

As we gear up for the weeks to come- I wanted to share a project I have been working on to help those of you who are preparing to find that balance of work and home yet again, or those who have kids and a whole new set of things to learn for the next year.  I wanted to take a moment and share something that will hopefully help you for the next 3 months (if you choose to utilize them) or for when life is so busy you can't see straight (which happens more frequently this time of year).  Please take a moment to check out the link below which directs you to 11 weeks (as of right now) worth of menu plans and grocery lists that on average prepares between 5-7 dinners for your family, can feed a family of four for around $150 a week (some weeks are more, some are less depending on what you have in the freezer and pantry and if you buy in bulk when sales are on).  I hope that this helps take some of the burden off of you in the year to come- and I hope you enjoy a week (or eleven) off from the pressure of balancing school and home.

Taste of the Blue Ridge Weekly Meal Plans


May God bless you in the school year to come and may your students get to know Him through you and your actions.  Although every day is not going to be great, may we remember that we have one of the greatest careers on earth and can be an influence on the lives of youth within our community.  May we be a positive influence when they have none at home.  May we be a shoulder for them to lean on when life hands them lemons.  May we be there to celebrate their accomplishments.  May we provide a safe haven and environment so they may grow.  May we provide memories that last a lifetime.  And somewhere along the way- may we provide them lessons about life in addition to the curriculum(s) we teach.

With lots of love and blessings-  Momma P

Tuesday, August 5, 2014

More Biscuits Please...

We had an alumni meeting last night, which meant that we caught a quick bite to eat at a local restaurant before heading back to school.  Shortly after we sat down, the waitress brought over a basket of fresh, hot biscuits for us to nibble on while we waited for our meal and I was instantly taken back to my grandma's kitchen and watching her make biscuits for our family at every meal.

Grandma and Grandpa lived a simple life- and tenant farmed for most of my dad's childhood until their
children were old enough to go in together and purchase a small farm for their parents that was about 5
minutes from where I was raised.  The sense of duty and family ties was as thick as the blood that ran through their veins.  If any of dad's seven brothers or sisters or any of our cousins (there were thirteen of us total in our generation) came up- Grandma would call those of us who lived close by and want to have us over for lunch.  Grandma's table always had a a feast with some kind of meat, applesauce and cucumbers with green onions in vinegar and fresh biscuits among a variety of other veggies (most of which she raised in her garden).

Grandma always made her biscuits in the dinning room- she had a huge wooden bin that sat in the corner that she kept her flour stocked in.  She would measure it out, throw in the lard and work her magic in making biscuits for our family.  She always knew just when the dough was right and ready to be rolled out and cut (using a glass jar) without ever looking at a recipe.  In many ways, this reminded me of how she tended to us as a family, always knowing when to encourage us, support us and being the bond that tied us all together. Grandma loved her family fiercely and took pride not in what they had but in who they were.  It wasn't about the fancy things that could be bought but how we stuck together when we needed to.  

When my youngest asked for "more biscuits please" last night, I couldn't help but remember back to my childhood and watching my grandma make those mouthwatering biscuits and the love that she instilled in our family or the patience she had to get her dough "just right".  Grandma never took a short cut with a canned or frozen biscuit, preferring to use her hands to provide for our family.  I hope that this is a lesson I can teach my boys- that although sometimes it is easy to accept what is easiest as being "okay"- great things can be achieved when you use your hands to make something from scratch.  (Although I do cheat and use frozen biscuits more than I should)  I hope my boys will look back on their childhood as adults and have moments when they remember these "bites" from childhood.
Never Fail Biscuits

Ingredients:

  • 2 cups all-purpose flour
  • 1/2 teaspoon salt
  • 4 teaspoons baking powder
  • 1/2 teaspoon cream of tartar
  • 2 teaspoons white sugar
  • 1/2 cup butter, chilled and diced
  • 3/4 cup milk

Directions:
1.Preheat oven to 450 degrees F (230 degrees C).
2.In a large bowl, sift together dry ingredients. Cut in butter until mixture resembles coarse oatmeal. Make a well in the center of the dry mixture and pour in the milk. Stir until dough begins to pull together then turn out onto a lightly floured surface.
3.Press dough together and then roll out until 3/4 inch thick. Cut into 2 inch round biscuits and place on an ungreased baking sheet.
4.Bake in preheated oven for 10 minutes, or until golden.

Sunday, August 3, 2014

Aunt Dot's Salmon Patties & 14 Day Sweet Pickles

Family traditions come in all fashions- from celebrating traditions such as Decoration today to special dishes that are passed down as old family recipes.  I hope that you enjoy the following two dishes that were passed on to be by my Great Aunt and are definitely a taste of the Blue Ridge!

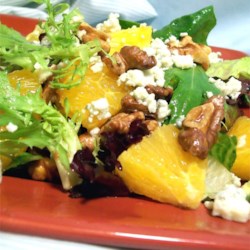
It doesn't matter where in the Blue Ridge you are, at some point you will probably be served a traditional meal of  Salmon Patties, Macaroni & Cheese & Peas.  The first time I made this meal for my husband, he laughed and said that his momma used to make the same meal when he was little/  Since today would of been her birthday, I would like to honor her memory as well as my Great Aunt who passed on this family recipe in today's entry.  These patties are so good that my grandfather used to have me come over to his house and make these for him when I was in high school.  I hope that you and your family enjoy them as much as our family does!

Salmon Patties
  • 1 (16 oz) can pink salmon- drain, debone and remove skin
  • 2 eggs, beaten
  • 1/2 cup Ritz Crackers, crumbled
  • 1/2 Tbl salt
  • 1/2 tsp black pepper
  • Butter Flavored Shortening (for frying)
Beat eggs.  Combine with crumbs and other ingredients and add to salmon, mixing well.  Shape into patties and place into skillet in which shortening has been melted over medium heat.  Brown well, turning once.


Growing up our Great Aunt Dot made the best 14 Day Sweet Pickles that were always a treat for us. Her pickles and her beautiful roses (and love of Days of Our Lives) are things that I will never forget about her! Aunt Dot kept my sister and I when we were little- and spoiled us rotten! These take a little while to make, but the old saying is true- good things come to those who wait! They are so good that I have seen teenagers devour a jar in minutes!  Enjoy!


14 DAY SWEET PICKLES

  • 2 gallons sliced cucumbers
  • 1 pint salt
  • 1 gallon water
  • 1 tbsp. alum (heaping)
  • 2 1/2 pints vinegar (white)
  • 10 c. sugar
  • 2 cinnamon sticks
  • 2 tablespoons of Whole Cloves
  • Sterilized jars

Into sterilized stone jar, put 2 gallons of cucumbers, washed and sliced into 1/4" pieces. Regardless of size, they must be sliced or they will shrivel. Dissolve salt in 1 gallon boiling water and pour, while hot, over pickles. Cover and weight down the pickles and let stand (have water cover plate) and cover with a cloth for 6 days.

On the seventh day, drain, then pour 1 gallon boiling water over pickles; let them stand 24 hours, repeat this step for days 8 and 9.

On the 10th day, drain. Pour 1 gallon of boiling water with 1 heaping tablespoon of powdered alum over the pickles; let stand 24 hours.

On the following day (11th day), drain again and pour pickling mixture (see below) over pickles. Let stand 24 hours, and on day 12, drain the mixture into a pot to reheat to boiling and pour over the pickles. Repeat this process of draining the mixture and reboiling it and re-pouring it over the pickles on day 13. On day 14, collect mixture and reboil while you pack the pickles in hot, sterile mason jars, leaving ~ 1/2" headspace in jars. Pour boiled mixture over pickles and seal. (With the hot liquid and hot jars, they should seal without having to be processed in a hot water bath.)

For the pickling mixture, combine 2 1/2 pints of vinegar, with 10 cups sugar, and create a cheesecloth pouch for your cinnamon sticks and whole cloves); bring this to a boil and pour this over the pickles.

Decoration Sunday in the South...

In the Blue Ridge we are taught from an early age to appreciate our roots and ties to an area and to honor those loved ones in our lives who have passed on before.  It did not matter if they had passed away (bless their hearts) long before we were a glimmer in our parents eye, we were told stories that made them very real to us and our every day lives.  From furniture in our homes, quilts that were passed down from one generation to the next, or mouth watering recipes served at special occasions our family ties were always emphasized and honored.  I am blessed to have grandparents and parents who have passed these stories and traditions on to me, and I hope to be able to pass them (along with a few more) to my boys in the years to come.

One of the most sacred and beautiful traditions in our part of the mountains is the tradition of Decoration Day at the churches our families have attended and those whose cemeteries become their final resting place here on earth.  Although many churches "down below the mountain" hold homecomings, Decoration is a little something more in that not only do families come home to gather for a meal in the church but in the days leading up to and the day of, they go out to the cemetery to tend to love ones graves and to place beautiful flower arrangements (real, silk and more recently a trend of beautiful mixed pots) to "decorate" the grave for the day.  Throughout the community I was raised in, each church has a different Decoration Day and family members from all over come home to celebrate the lives their ancestors.  

Today was Decoration Day at the little church that most of my ancestors are buried at.  My Great-Great Grandparents on my daddy's side to my Great-Grandparents on my mother's (and countless Great-Aunts and Uncles and family friends) and my own sweet Daddy are laid to rest on the hill across the road from the little church that we grew up in.  In the distance, you can see the beautiful Blue Ridge, and on the other side you can see an old white farm house (which happens to be where my father was born) and just across the hill is the house that I was raised in.  Our little church takes pride in being one of the oldest churches in the area, and there are gravestones from the early 1800's in the oldest part of the cemetery of people who came over from Scottland and Ireland and settled in this little corner of the mountains and carved a life and a community in this piece of God's country.  The ladies and men's groups (most of whom are well past the age of retirement) meet many times the week before and clean headstones, and spend an evening placing artificial arrangements on every single grave in the cemetery (unless they know that the family will be by to place flowers on before Decoration).  The men have identified those heroes who have served our country and have added a small American Flag to each of those stones as well.  The night before, many will gather in the cemetery to decorate their loved ones grave and catch up with longtime friends who live far away.  Sunday morning, families gather at the gravesides of their loved ones and catch up prior to a special church service which is followed by a community pot luck dinner in the church fellowship.  Generations of families gather together to celebrate and share memories of days gone by and to honor their loved ones.

I remember growing up that the DOT would plan their mowing schedule around decoration, and mow our road in anticipation of the day.  Our whole road (most of which were either blood or church family) always made sure that their yards and flowerbeds were in top notch condition and we always made sure our house was spotless inside and out (even down to scrubbing windows and shutters) in anticipation of whoever might stop by as they made the venture home for Decoration.  These memories came back today as we went home for this event. As we walked through cemetery today I was reminded of the stories of my ancestors that my dad and grandparents told us growing up.  I found myself walking in my dad's footsteps as we walked through the cemetery with the boys and I shared stories of past generations with my boys.  I want them to know about their Great Great Aunt and Uncle who played such a big role in our lives growing up (and whose recipe I follow for the sweet pickles I make).  I want them to know about their Great-Great Grandfather who loved licorice and taught me to play checkers, and his wife (my Great Grandmother) who earned her high school degree at the young age of 80.  I want them to know about my grandparents, who would call every time that a family member would come home for us to come over and visit- grandma who taught me to sew and my quiet grandpa who picked on me about being his "Old Woman" during his last winter when my responsibility was to keep his woodpile stacked so he wouldn't have to go to the woodshed.  I want them to know my father- who was so key in my life and share the stories he told us and the unconditional love he gave us.  I want them to have the same tradition and roots that were given to me growing up.  Today was step along that journey as they helped to place flowers on the grave, they listened to the stories and they learned to appreciate the generations past.  Today is a day for reflection, memories and to miss those we love.